Mastering Ultimaker Cura: An In-depth Exploration of 3D Printing Settings and Techniques
What is Ultimaker Cura?
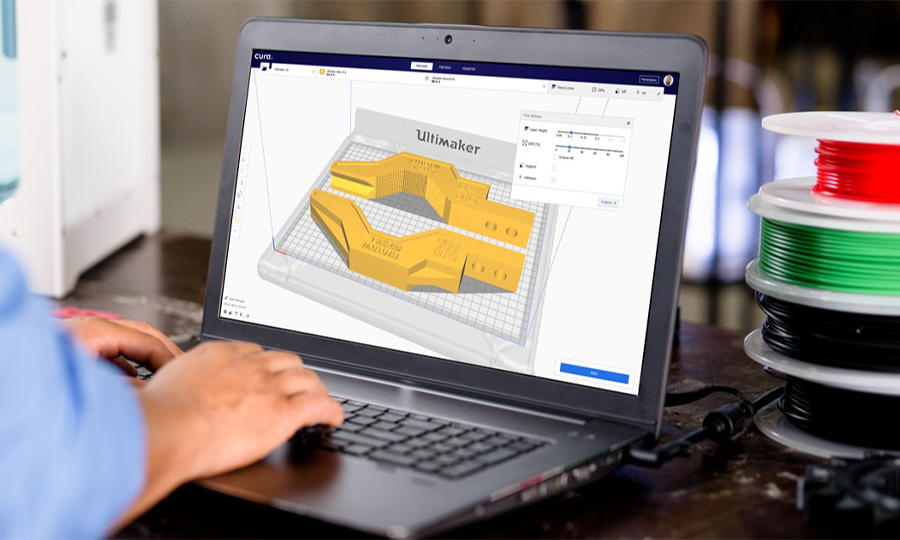
Ultimaker Cura stands as a top-notch slicing software tailored for FDM 3D printers. This software, a brainchild of the globally acknowledged 3D printer manufacturer, Ultimaker, has won praise for its broad spectrum of features and capabilities. These expansive options equip users with a substantial degree of control over the settings required for successful 3D printing.
One of the most crucial functions of Cura is its ability to transmute 3D models into a language that 3D printers can comprehend – the G-code. This G-code comprises a succession of programming commands that a 3D printer interprets to create the desired object layer by layer. In this comprehensive article, we will explore the nitty-gritty of these print settings to help you maximize the potential of your 3D printing projects using Ultimaker Cura.
To ensure a seamless 3D printing experience, a few initial settings need to be configured correctly:
- Choosing your 3D printer: An exceptional feature of Cura slicer is its inclusive list of most popular 3D printers. To get started, all you need to do is identify and select your specific printer model from this pre-existing list.
- Access this through: Settings > printer > add printer
- Material selection: After picking your printer, the next step involves choosing the filament type. Cura offers an exhaustive list of almost all filament materials, allowing you to pick the most suitable one for your printing needs.
- This can be found at: Settings > Extruder > material
- Filament diameter: Filament diameters usually come in two standard sizes – 1.75 or 2.85 mm. It’s crucial to match the diameter setting in the slicer to the actual diameter of the filament you’re using to ensure accuracy.
- This is located at: Settings > printer > manage printers > select your printer > machine settings > Extruder > compatible material diameter.
- Nozzle size: An equally important setting to verify is the diameter of the nozzle. The set nozzle diameter in the slicer should align precisely with the diameter of the nozzle installed in your printer.
- Access this via: Settings > Extruder > Nozzle size
After successfully setting up the initial parameters, we can dive into the “Quality” section. Here, we encounter several crucial settings that significantly affect the overall quality of your 3D prints.
1- Layer height:
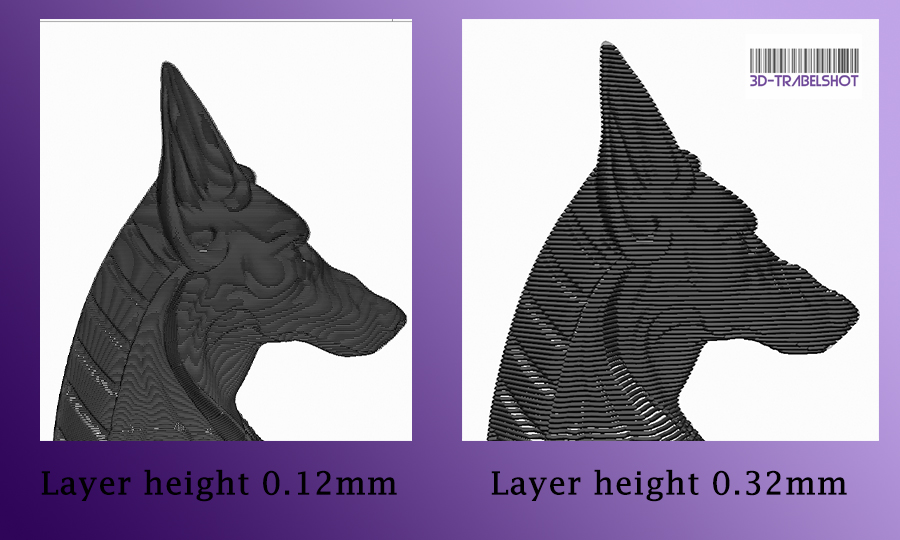
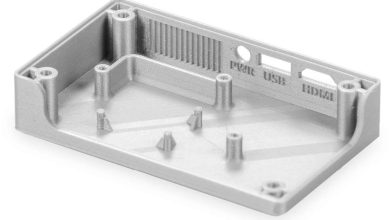
Every 3D printer builds designs by laying down material layer by layer. The layer height setting determines the thickness of these individual layers measured in millimeters. Fine-tuning this setting can substantially improve print quality. A lower layer height value will render a smoother surface and make intricate details more noticeable, enhancing the aesthetics of the final product. Conversely, a higher layer height leads to a less smooth surface, compromising the visibility of small details. Layer height in FDM printers typically ranges between 0.08 and 0.4 mm. However, the optimal layer height is largely influenced by the nozzle size used, with each nozzle diameter having a minimum and maximum value for layer height. Here’s a quick guide:
Min layer height = 0.25 x nozzle size
Max layer height = 0.75 x nozzle size
2- Initial layer height: This parameter gives you control over the thickness of the first layer laid down by the printer. Usually, the first layer is set thicker to promote the design’s adhesion to the print bed, ensuring a stable foundation for the subsequent layers. The recommended value for the initial layer height typically lies between 0.2-0.3 mm.
3- Line width:
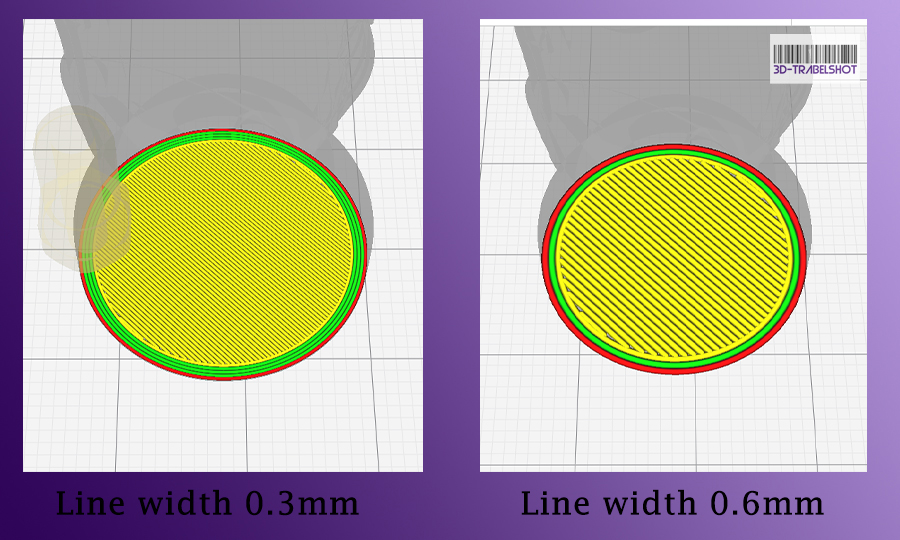
This setting refers to the horizontal width of each line laid down, measured in millimeters. By default, it’s equivalent to the nozzle diameter, but it can be modified within specific limits to meet particular printing requirements. The general recommendation is to set the line width between 75-120% of the nozzle diameter. However, in certain cases, it can range between 65-200% of the nozzle diameter.
Outer wall line width:

This refers to the width of the external line that forms the wall of the printed object. This setting is typically on par with the nozzle size. However, if you’re printing a model with intricate external details, you might want to slightly decrease this setting. This reduction can enhance the visibility of those details and surprisingly, also improve the structural strength of your design.
Inner wall line width: This setting corresponds to the width of the interior line that forms the wall of the printed part. This width can be increased up to 150% of the nozzle diameter, which can drastically reduce print times for larger parts without affecting the exterior appearance. This is especially beneficial if the aesthetics of the inner walls are not of primary importance.
Top/Bottom line width:

This parameter controls the width of the lines forming the top and bottom layers of the model. For sizable models where time is a crucial factor, expanding the line width to 120% can save substantial print time. However, if you’re after a higher quality surface finish, a 75% line width would be more appropriate, although it will result in longer print times.
Infill line width:
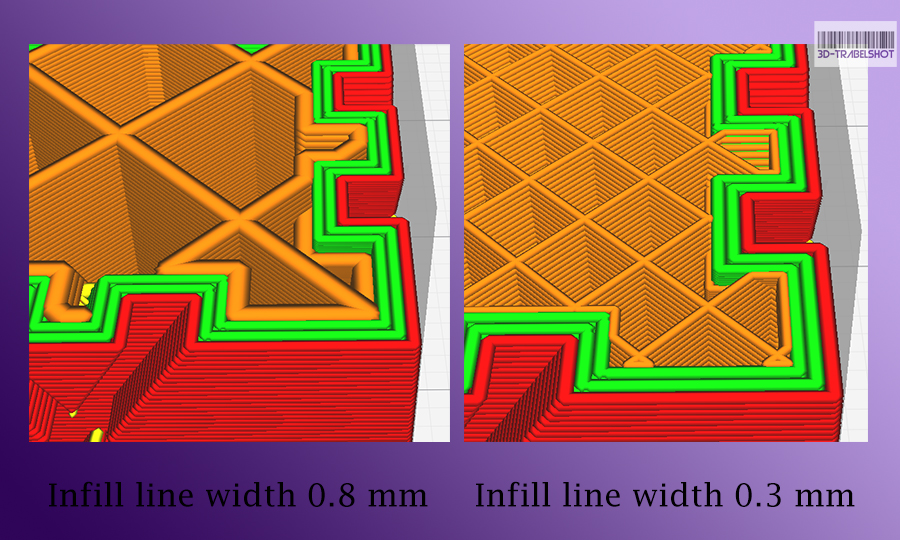
This setting adjusts the width of the lines forming the internal fill pattern, known as the infill. The infill line width default value is usually set to the diameter of the nozzle. However, tweaking this setting can help strike a balance between the strength of the printed model and the printing time. For instance, increasing the infill line width can reinforce the printed model’s robustness and reduce printing time, while decreasing this value can be beneficial when the strength of the printed model isn’t a priority and time-saving is the objective.
Skirt/Brim line width: This feature enables you to fine-tune the width of the skirt or brim line. While this setting doesn’t typically need modification, there are cases where slightly increasing the width of the brim line can enhance print adhesion, especially if the part being printed has a small contact area with the print surface. This slight increase can augment the contact area, improving the adhesion of the print to the print bed.
Support line width:
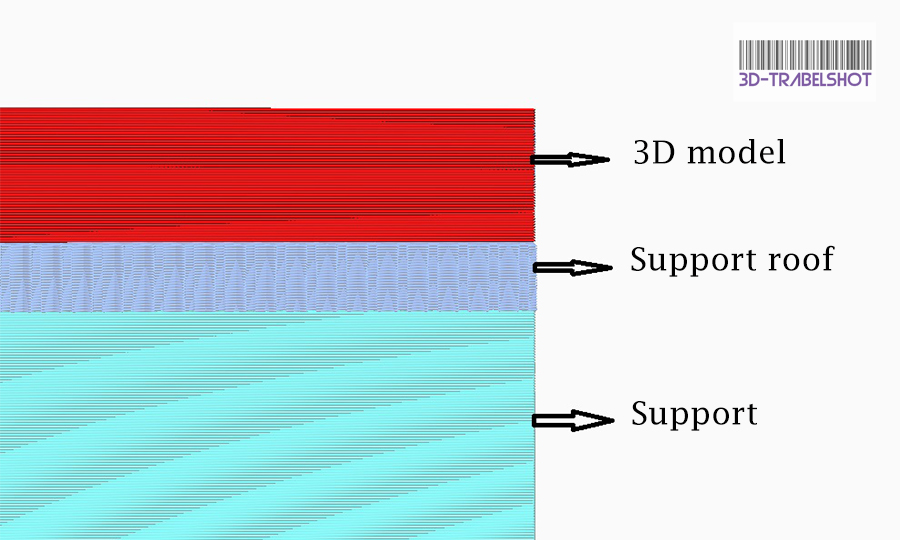
Increasing the support line width can save print time but might compromise the quality of the bottom surface in contact with the support. This issue can be mitigated by enabling the support roof and reducing its line width.
Support roof line width: This refers to the width of the line forming the dense layer (support roof) that sits atop the support structure, directly underneath the printed part. To achieve a high-quality, smooth surface finish on the part of the model in contact with the support roof, it’s crucial to ensure that the support roof itself is printed with high precision. You can accomplish this by slightly reducing the support roof line width, but it’s crucial not to exceed the permissible limit. Conversely, increasing this line width can reduce the surface quality and potentially complicate the removal of supports.
In conclusion, these are the primary print settings you’ll need to navigate when using Ultimaker Cura for your 3D printing projects. Understanding these parameters and their implications on your prints is instrumental to achieving optimal results and pushing the boundaries of what can be created with 3D printing technology. With this comprehensive guide at your fingertips, you’re now equipped to harness the full potential of Ultimaker Cura and explore the fascinating world