FDM 3d printer Acceleration and Jerk Control in Ultimaker Cura slicer
In FDM 3D printing, getting high-quality prints goes beyond just choosing the right filament, temperature, and print settings. Smooth, consistent movement of the print head is essential for obtaining high-quality prints and fine surface finish. Therefore, it is important to adjust acceleration and jerk control in order to achieve a balance between quality and printing time.
What is FDM 3d printing Acceleration?
Acceleration is the rate at which the speed of the print head changes as it moves from one point to another during the printing process.
You can liken this to a car accelerating from rest until it reaches the desired speed. The acceleration in 3D printing is governed by the maximum printing speed, which is predetermined in the slicer software.
Impact of FDM 3d printing Acceleration setting.
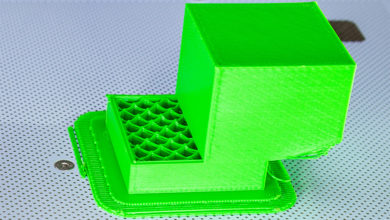
1-Layer Shifting.
High acceleration values can cause the print head to move quickly and stop suddenly, which lead to timing pulley belt slippage. This results in layer misalignment or “layer shifting,” producing noticeable gaps or mismatched features in the printed object.
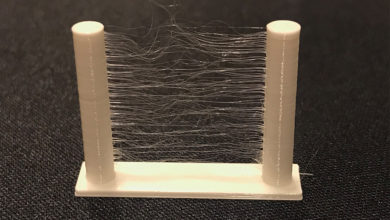
2-Surface Finish.
Excessive acceleration can create vibrations that affect the print head’s position, resulting in surface defects such as roughness or ghosting (ringing). Adjusting acceleration settings helps mitigate these issues, ensuring smoother and more accurate prints.
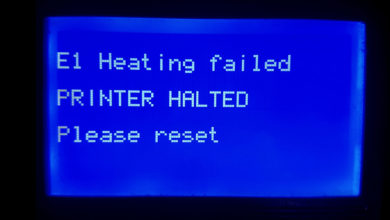
3-Stepper Motor Overheating.
Increased acceleration forces the stepper motors to accelerate rapidly, requiring an extensive current flow. The motor coils heat up more as a result of the higher current load, which could cause overheating and shorten the motor’s lifespan.
4-Printer Stability.
Rapid acceleration can cause the printer to shake or move violently, which may affect the overall stability of the machine and the print.
From here we conclude the importance of adjusting the acceleration settings correctly to avoid the above-mentioned issues.
What is FDM 3d printer Jerk?
Jerk refers to the instantaneous change in speed that the print head or the build platform can handle. It is a crucial parameter in determining the smoothness and quality of your prints.
Impact of FDM 3d printing jerk Settings.
1-Smooth Transitions.
Proper jerk settings ensure smooth transitions between different speeds, reducing vibrations that can lead to print defects. This is particularly important for detailed prints and complex geometries.
2-Reducing Noise.
Lower jerk values can make the printer operate more quietly by reducing the sudden changes in speed that cause mechanical noise.
3-Precision in Small Movements.
Adjusting jerk settings can improve the accuracy of small movements, which is crucial for printing fine details and intricate patterns. It helps in achieving cleaner edges and more precise features.
4-Stress on Printer Components.
High jerk settings can strain the printer’s mechanical components, such as belts and pulleys. Over time, this can lead to wear and tear, reducing the lifespan of these parts. Proper jerk settings ensure smoother operation and longer-lasting components.
Adjusting Acceleration and Jerk in Ultimaker Cura.
To achieve optimal 3D print quality and efficiency, fine-tuning acceleration and jerk settings in is essential.
We will know how to adjust the acceleration and jerk setting in Cura slicer. Here is a step-by-step guide to accessing and adjusting these settings.
- Open Ultimaker Cura slicer and load your model.
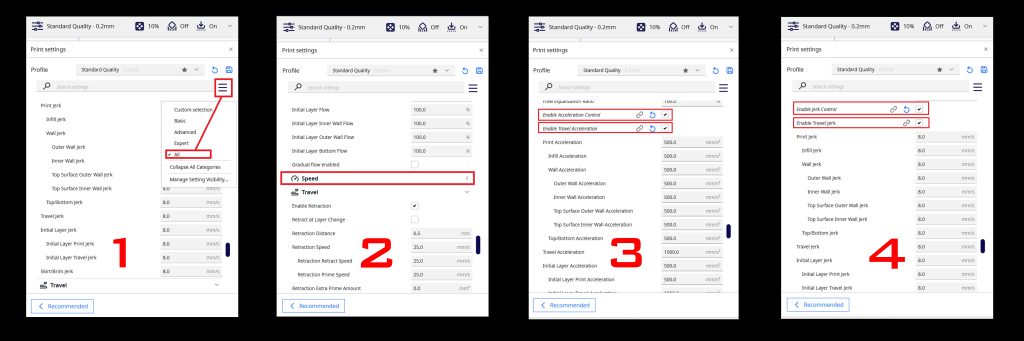
- Make sure that “ALL” mode is selected.
- Scroll down to the “Speed” dropdown menu.
- Check “Enable acceleration control”, “Enable travel acceleration”, “Enable jerk control “,and “Enable travel jerk”.
By checking “Enable acceleration control” you will find a list of controlling acceleration for different parameters, by default “print acceleration” value is set as 500 mm/s2.
Other values for acceleration and jerk, such as infill, walls, top and bottom layers, travel, initial layer and skirt/brim are initially set to match the print acceleration value. However, you can adjust each one individually for better control.
You can experiment with these values and choose the most appropriate one to achieve a balance between quality and reducing printing time.
Recommended Values of Acceleration in Cura
1. Print Acceleration:
Recommended Value: 500-1500 mm/s²
This setting controls the acceleration during actual printing. Lower values (around 500 mm/s²) are generally better for detailed prints with fine features, as they reduce vibrations and improve print quality. Higher values (up to 1500 mm/s²) can be used for faster prints where detail is less critical.
2. Infill Acceleration:
Recommended Value: 1000-3000 mm/s²
Infill doesn’t require the same level of precision as the outer walls, so higher acceleration values can be used to speed up the print without significantly impacting quality.
3. Wall Acceleration:
Recommended Value: 500-1000 mm/s²
The walls are critical to the structural integrity and visual quality of the print. Keeping the acceleration lower here helps in achieving cleaner and more precise walls.
4. Top/Bottom Acceleration:
Recommended Value: 300-1000 mm/s²
The same as walls, top and bottom layers benefit from lower acceleration values to ensure smooth and flat surfaces.
5. Travel Acceleration:
Recommended Value: 1000-3000 mm/s²
This setting controls the acceleration during non-print moves. Higher values can reduce overall print time but may introduce more vibrations if set too high.
Recommended Jerk Settings in Cura
1. Print Jerk:
Recommended Value: 8-20 mm/s
Start with a value around 10 mm/s. Lower values (closer to 8 mm/s) can improve print quality by reducing sudden movements that can cause ringing and ghosting. Higher values (up to 20 mm/s) can speed up the printing process but may impact quality.
2. Travel Jerk:
Recommended Value: 10-30 mm/s
Begin with a value around 20 mm/s. Higher travel jerk values allow for faster non-print moves, which can reduce overall print time. However, very high values (closer to 30 mm/s) might cause layer shifting or increased mechanical stress.
3. Infill Jerk:
Recommended Value: 10-25 mm/s
Infill does not require the same level of precision as outer walls, so slightly higher jerk values can be used to speed up the print.
4. Wall Jerk:
Recommended Value: 8-15 mm/s
For outer walls where precision is crucial, start with a lower value around 10 mm/s. This helps in achieving cleaner and more accurate prints.
5. Top/Bottom Jerk:
Recommended Value: 8-15 mm/s
Similar to wall jerk, lower values help in achieving smoother and more consistent top and bottom layers.
Conclusion
Mastering acceleration and jerk settings in your 3D printer can vastly improve your print quality and printer performance. By carefully adjusting these parameters, you can achieve smoother surfaces, more precise details, and reduce common issues like layer shifting and vibrations. Although it requires some experimentation, the benefits of fine-tuning these settings are well worth the effort, leading to consistently better and more reliable prints.